A threaded bushing for wood is a metal piece with threads inside. You put it into a hole you drilled in the wood. You use a threaded bushing when you want a strong and reusable hold in soft woods like pine or plywood. This insert stops the threads from getting ruined, which can happen if you screw straight into wood. Many woodworkers like threaded bushings because they make strong joints. They also let you put furniture together or take it apart many times without hurting the wood. You get long-lasting strength and parts that fit well, but you must choose the right kind and put it in carefully to get the best results.
Key Takeaways
Threaded bushings make strong connections in wood. You can use them again and again. They help stop the wood from getting damaged. They also make it easy to put things together and take them apart.
Pick the right type, size, and material of threaded insert. Think about your wood and what you need for your project. This helps make the connection strong and last longer.
Use the right tools for the job. Drill straight pilot holes that are the correct size. This helps you put in the inserts safely. It stops the wood from splitting or the insert from spinning.
Put some lubricant on the threads before you install them. Follow each step in the instructions. This helps the insert fit tight and flat. It will last a long time.
Do not make common mistakes like tightening too much or using the wrong hole size. If your wood is soft, add glue to the holes. This makes the joints last longer.
Threaded bushing basics
What is a threaded bushing?
You use a threaded bushing when you want a strong, reusable connection in wood. This small metal part has threads inside and outside. The outside threads grip the wood, while the inside threads hold a bolt or screw. You drill a hole in the wood and twist the threaded bushing into place. This creates a secure anchor for hardware. You often see threaded bushings in furniture, cabinets, and woodworking jigs. They help you avoid stripping the wood and make it easy to take things apart and put them back together.
Tip: If you plan to assemble and disassemble a project many times, a threaded bushing gives you a reliable solution.
How does it work?
A threaded bushing works by creating a tough, spiral-shaped channel inside the wood. You insert the bushing and the outer threads bite into the wood fibers. This design lets you screw and unscrew bolts without damaging the wood. The metal insert spreads the force over a larger area, so the connection stays strong. You get higher clamping force and better durability than with nails or lag screws. Threaded bushings allow you to adjust or reuse the connection, which is not possible with most traditional fasteners.
Threaded bushings last for many years in wood. Some wooden threads have survived for decades, even up to a century, before wearing out.
Metal threaded bushings, such as brass or steel, offer even greater durability. You can use them for projects that need frequent assembly and disassembly.
The main reason wood threads fail is fatigue from repeated use. You can reinforce the wood with glue, but metal bushings provide the best long-term results.
You get a strong, reusable thread that outperforms regular wood fasteners. Threaded bushings make your projects last longer and work better.
Threaded inserts types
Flanged and flush styles
You can choose from two main styles of threaded inserts for wood: flanged and flush. Flanged inserts have a rim or "flange" that sits on the wood surface. This flange spreads the load and stops the insert from sinking deeper into the wood. You often use flanged inserts when you want extra holding power or need to prevent pull-through. Flush inserts, on the other hand, sit below the wood surface. You use these when you want a smooth finish or need to hide the insert. Both styles work well in furniture, cabinets, and woodworking jigs.
Note: Flanged inserts are easier to install because the flange acts as a stop. Flush inserts need careful depth control so they do not go too deep.
You will also find T-nuts, which provide a flush fit and are popular in furniture assembly. Press-in inserts and thread-in inserts offer different installation methods. Press-in inserts push into a pre-drilled hole, while thread-in inserts screw in for a tighter fit.
Knife-thread and hex drive
Knife-thread and hex drive inserts are two of the most common types you will use in woodworking. Knife-thread inserts have sharp, cutting threads that slice into hardwoods like oak or maple. These threads give you a strong grip and high holding power. You install knife-threaded inserts by screwing them into a drilled hole, sometimes using a bolt and jam nut for extra control.
Hex drive inserts work best in softwoods and engineered woods such as MDF or plywood. You install these with an Allen wrench or special drive tool. The hex shape helps you turn the insert easily and keeps it from slipping. Both types come in flanged and flush styles.
Here is a quick comparison:
Feature | Hex Drive Inserts (Softwood) | Knife-Thread Inserts (Hardwood) |
Wood Type | Softwoods, MDF, plywood | Hardwoods (oak, maple, cherry) |
Installation | Allen wrench or drive tool | Screwdriver, drive tool, or bolt |
Holding Power | Good in soft/engineered woods | Very strong in hardwoods |
Surface Finish | Flanged or flush | Usually flush |
Material | Zinc alloy, steel | Brass, stainless steel |
You can find threaded inserts made from brass, steel, or stainless steel. Brass inserts resist corrosion and work well for most projects. Stainless steel inserts give you extra strength and last longer in wet or harsh conditions. Steel inserts are strong and cost-effective for general use. Most threaded-in inserts follow ANSI/ASME or metric thread standards, so you can match them with standard bolts and screws.
Uses and benefits
Common applications
Threaded metal inserts are used in lots of wood projects. They help you build furniture that comes apart and goes back together many times. Flat-pack furniture uses these inserts a lot. You push them into holes you drilled before. They stay put and do not spin. This makes putting furniture together easy. The joints stay tight and strong.
You also find threaded metal inserts in cabinets and shelves. They give you metal threads that last longer than wood. You can use them in kitchen cabinets, wardrobes, and storage units. These inserts help cabinets stand up to wear and shaking.
Office furniture like desks and tables use threaded metal inserts too. They make it easy to put furniture together at work or home. You can move or adjust the furniture without hurting the wood. The joints stay strong and the furniture looks good.
Tip: Use threaded metal inserts when you need to take things apart often. You will get a better look and your project will last longer.
Advantages over wood screws
Threaded metal inserts are better than wood screws in many ways. They give you stronger and tougher threads. The metal stops the threads from getting stripped or loose. This matters if you use the wood a lot.
These inserts spread the force over more wood. This helps stop the wood from cracking or splitting. You can take your project apart and put it back together many times. The wood will not wear out fast. Some inserts have a flange that protects the wood and makes the joint stronger.
Threaded metal inserts make your joints look neat and professional. Your wood projects will last longer and look nicer than if you only use wood screws.
Choosing threaded inserts
Size and material
When you pick threaded inserts for your project, you need to think about the size and material. The right choice helps your project last longer and stay strong.
Material of the insert: Brass works well if you want corrosion resistance and good durability. Steel gives you high pull-out strength, which is great for heavy-duty jobs. Zinc is more affordable but does not last as long as brass or steel.
Size of the insert: Match the insert size to the thickness of your wood. If you use a size that is too big or too small, you can weaken the joint or even damage the wood.
Insert type: Screw-in, press-in, thread-cutting, and thread-forming inserts all work best in different situations. Choose the type that fits your wood and project needs.
Application needs: Think about how much weight or force the joint will hold. For projects that need to look good, pick inserts that sit flush or have a neat finish.
Tip: Always drill the pilot hole to the right size. For hardwood, use a smaller hole for a tight fit. For softwood, use a slightly larger hole to prevent splitting.
Here is a quick table to help you choose the right material:
Material | Durability | Corrosion Resistance | Best Uses |
Brass | Moderate strength | Excellent | Softwoods, humid places, plastics |
Steel | High strength | Good (excellent for stainless) | Hardwoods, outdoor, heavy-duty |
Zinc | Moderate | Good | Softwoods, MDF, budget projects |
Thread type and load
Thread type and load capacity are just as important as size and material. You want the threads to match your wood and the job you need to do.
Coarse threads work best in softwoods like pine or plywood. They grip better and are easier to install.
Fine threads are better for hardwoods such as oak or maple. They give you a strong hold in dense wood.
Self-tapping inserts are good for MDF and engineered wood. They make assembly quick and easy.
Type | Recommended Wood Types | Best Applications | Advantages |
Fine-Threaded | Hardwoods | Furniture, cabinetry | Strong grip in dense wood |
Coarse-Threaded | Softwoods | Shelving, general woodworking | Easy install, secure hold |
Self-Tapping | MDF, plywood | Shop jigs, DIY projects | Quick, strong grip |
Load capacity depends on both the insert and the wood. Thicker-walled inserts hold more weight because they touch more wood. Stainless steel inserts give you the most strength and resist rust, which is good for outdoor or heavy-use projects. If you work with dense hardwood, pick inserts with special thread designs for the best pull-out strength.
Note: Always match the thread standard (like metric or ANSI) to your bolts and screws. This helps your project fit together perfectly and stay strong.
Installation guide
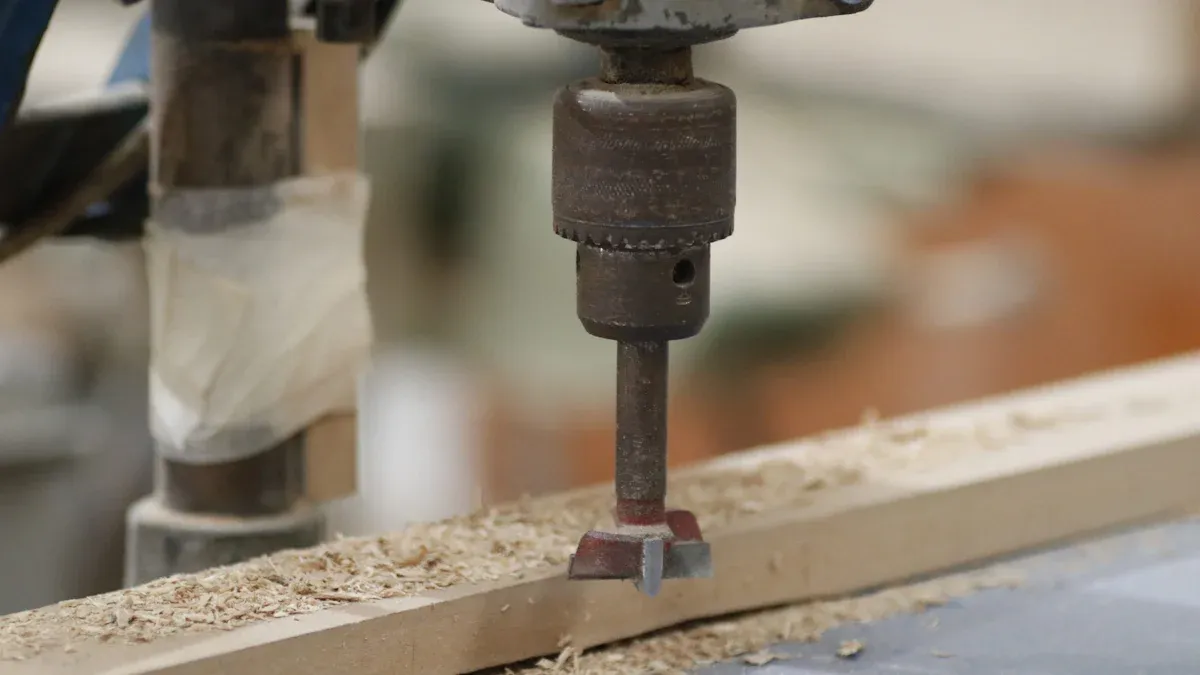 Image Source: pexels
Tools and prep
Before you start, gather the right tools for installing threaded metal inserts. Using the correct equipment helps you get a strong, long-lasting hold in your wood projects. Here is what you need:
Power drill or drill press for accurate holes
Drill bits that match the insert’s recommended pilot hole size
Insertion tool, such as a hex wrench, screwdriver, or a special drive tool
Countersink bit (optional) for a flush finish
Wax or soap to lubricate the threads
Mallet for gentle tapping if needed
Vacuum or brush to clean out wood dust
Experienced woodworkers often use a drill press for straight, precise holes. This tool helps you avoid angled holes, which can weaken the joint. E-Z LOK’s drive tools work well for both hardwood and softwood. These tools fit standard drills and make the process faster and easier. Always check your insert’s instructions for the best drill bit size. Practicing on scrap wood helps you find the perfect fit before you work on your actual project.
Tip: Lubricate the threads with wax or soap before installation. This reduces friction and makes it easier to screw the insert into the wood.
Step-by-step process
Follow these steps to install threaded metal inserts and avoid damaging your wood:
Mark and prepare the spot
Choose a clean, knot-free area on your wood. Mark the exact spot for the insert. Plan carefully to avoid splitting or weakening the wood.
Drill the pilot hole
Use the drill bit size recommended by the insert manufacturer. For softwoods, use a slightly smaller bit. For hardwoods, use a bit about 1/64 inch larger than the screw shank. Drill straight down to the depth of the insert. A drill press gives you the best accuracy.
Countersink the hole (optional)
If you want the insert to sit flush, use a countersink bit to create a small bevel at the hole’s edge. This helps the insert seat neatly.
Clean the hole
Remove all wood dust and chips. A clean hole lets the insert grip better and prevents misalignment.
Lubricate the threads
Rub a little wax or soap on the outside threads. This step makes it easier to screw in the insert and protects the wood from splitting.
Insert the threaded metal insert
Align the insert with the hole. Use your insertion tool (hex wrench, screwdriver, or drive tool) to screw the insert in slowly. Apply steady, even pressure. Do not force it. If you feel too much resistance, back out and check the hole size.
Set the insert flush
Stop when the insert is flush with or just below the wood surface. If needed, tap gently with a mallet to adjust the depth.
Test the fit
Thread a bolt or screw into the insert. Make sure it fits tightly and does not wobble. If the insert feels loose, you can add a small amount of wood glue or epoxy to the hole before installation. Let it dry fully before use.
Note: Always use the correct drill bit size and insert type for your wood. This prevents splitting and gives you the strongest hold.
Troubleshooting tips
Sometimes, problems can happen during installation. Here are common issues and how you can fix them:
Insert spins or pulls out
This usually means the hole is too large. Next time, use a smaller drill bit or add wood glue or epoxy to the hole before inserting. Let it dry for a stronger grip.
Wood splits or cracks
The pilot hole may be too small, or you may have forced the insert. Always drill the right size hole and lubricate the threads. Work slowly and avoid over-tightening.
Insert sits too deep or too shallow
Use a depth stop on your drill or mark the drill bit with tape. If the insert is too deep, fill the hole with wood glue and a dowel, then redrill. If too shallow, gently tap it down with a mallet.
Threads strip or fastener feels loose
Over-tightening can strip the threads. Use a torque wrench or adjustable clutch drill to apply the right amount of force. Always match the insert to the wood type and thickness.
Wrong tools cause damage
Use the correct insertion tool for your threaded metal inserts. Avoid using pliers or makeshift tools, which can deform the insert or damage the wood.
Reminder: Practice on scrap wood before your final installation. This helps you avoid mistakes and gives you confidence for your main project.
Tips for success
Maintenance
Keeping your threaded bushings in good shape helps your wood projects last longer. You can follow these steps to make sure your furniture stays strong and safe:
Choose the right type of insert for wood. This helps prevent loosening over time.
Drill holes with care. Use the correct size and keep the hole straight. This stops the insert from moving or cracking the wood.
Use special tools for installation. A hex wrench or drive tool works best. Avoid using pliers or makeshift tools.
Strengthen the wood around the insert. Apply a thin layer of cyanoacrylate (CA) glue to the hole before inserting. The glue soaks in and hardens the fibers, giving extra holding power.
For joints that need to last, add wood glue and dowels. This reduces movement and keeps the threads from failing.
If a screw hole gets damaged, replace it with a threaded insert. This restores strength and extends the life of your furniture.
For soft woods like MDF, inserts improve resistance to pulling and twisting. This makes your project more durable.
Tip: Treat your furniture assembly as a permanent process. This gives you the best strength and keeps your threaded bushings from loosening.
Mistakes to avoid
You can avoid many problems by watching out for these common mistakes:
Drilling holes that are too big or too small. Always check the size before you start.
Using a hand drill without keeping it steady. Wobbly holes lead to weak joints.
Overtightening bolts. This can strip the threads and ruin the insert.
Forgetting to reinforce the hole with CA glue, especially in soft woods.
Not letting glue dry fully before using the insert. Wet glue weakens the hold.
Note: Always drill straight and use the right tools. Take your time to get the best results.
If you follow these tips, your threaded bushings will give you strong, long-lasting connections in all your woodworking projects.
Threaded bushings give you strong, reusable connections in wood. You can use them for furniture, jigs, and projects that need to come apart and go back together. Experts say these inserts stop wood from wearing out and make repairs easy.
You should always pick the right insert for your wood.
Drill straight holes and use the right tools.
Follow each step for a secure fit.
Many woodworkers find threaded bushings reliable and easy to use. Try these tips in your next project to make your work last longer and look better.
FAQ
How do you choose the right size threaded bushing for wood?
Measure the thickness of your wood. Pick a bushing that fits without going through the other side. Check the manufacturer’s chart for pilot hole size. Always test on scrap wood first.
Can you remove and reuse threaded bushings?
Yes, you can remove most threaded bushings. Use the same tool you used for installation. If you work carefully, you can reuse the bushing in another project.
What type of wood works best with threaded bushings?
You can use threaded bushings in both hardwood and softwood. Hardwoods like oak or maple hold bushings very well. Softwoods work too, but you may need larger bushings for a strong grip.
Do you need glue when installing threaded bushings?
You do not always need glue. For a tighter fit or in softwood, add a drop of wood glue or epoxy. This helps the bushing stay in place and prevents spinning.
What tools make installation easier?
These tools help you install bushings straight and with less effort.


